Report Setup
To get started, open a browser and navigate to the SQL Server Reporting Services website. This will usually require you to sign in by providing valid credentials.
Creating a new data source
Note: If you already have set up a data source to connect to your database, you can jump straight to Configuring and uploading the report file, unless you are connecting to another one.
Once signed in, click on New and select Data source from the dropdown.

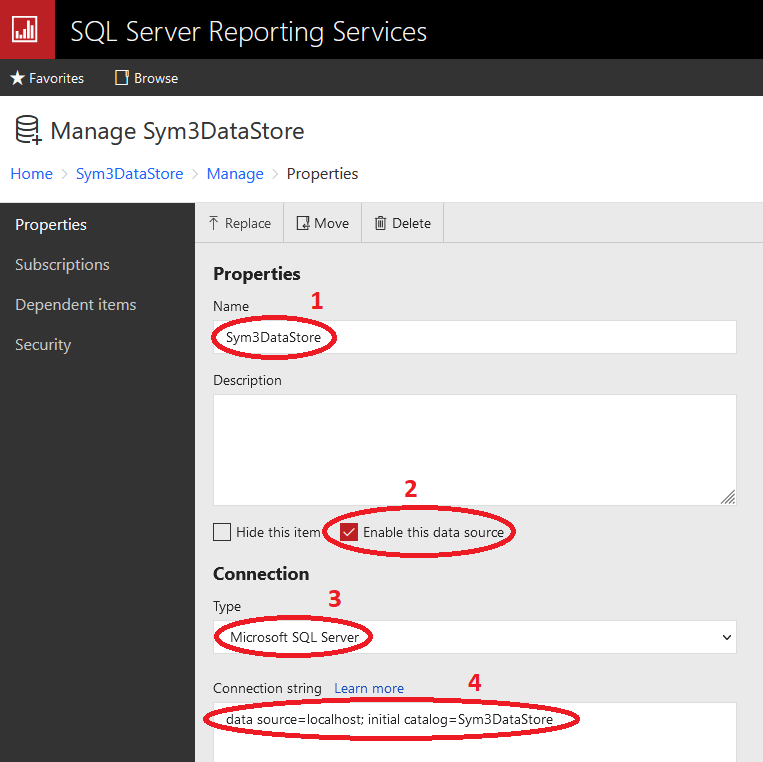
Give your data source a name and make sure that the Enable this data source checkbox is ticked in.
Under the Connection header, select the connection type Microsoft SQL Server and enter the appropriate connection string. The data source refers to the address the database is run from, while the initial catalog refers to the name of the database itself. If you need further assistance with the connection string, click on Learn more next to Connection string.

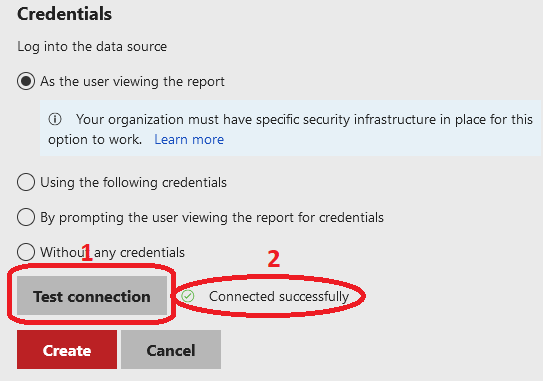
Scroll down to the Credentials header and select the appropriate method to log into the data source.
Then, click on the Test connection button to validate the connection to the database. If successful, a small message should appear, confirming that the connection was successful.

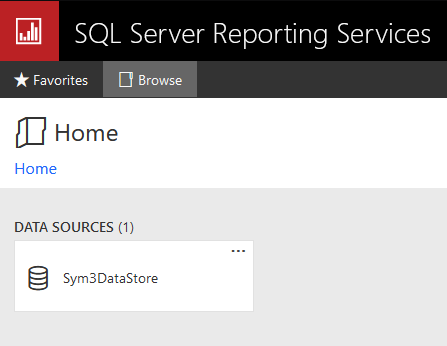
Once the connection is successfully established, click on the Create button. You will be sent back to the home folder and your newly created data source should appear.

Configuring and uploading the report file
If you haven’t done so already, download the resource file from the desired report’s documentation page and extract it using your preferred tool. The resources stored in the .zip file contain both the required files for the database setup and the report setup.
Launch a new instance of Microsoft Report Builder, and open the report’s .rdl file located in the Report file folder, in the report’s extracted resource folder.
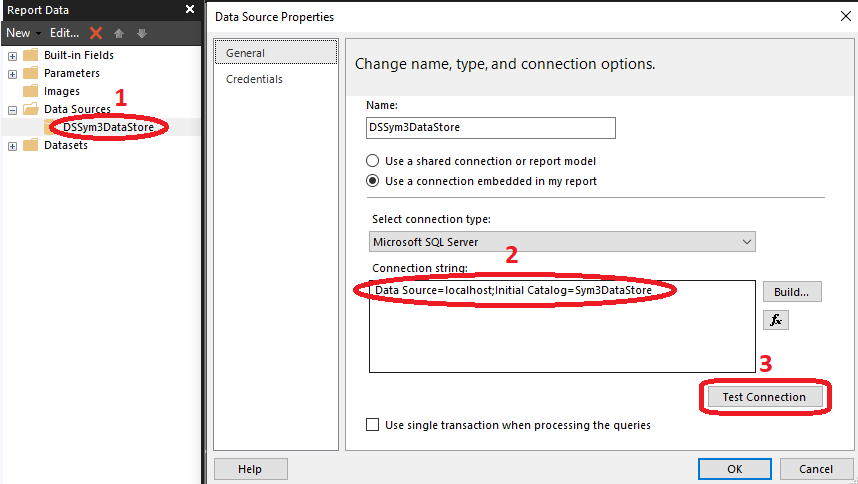
Under the report data, expand the Data Sources folder, right-click on the data source, and select Data Source Properties.
A window should pop up and, under the General tab, make sure that the connection string matches the one configured on the SQL Server Reporting Services website.
Click on the Test Connection button to validate the connection and click on OK to close the data source properties window.

Save and close the report and return to the SQL Server Reporting Services website.
Click on Upload and select the .rdl file that was just closed. After receiving a confirmation message, the report should appear.

The report is now accessible on the SQL Server Reporting Services website and can be used by clicking on the report name.