Project Explorer
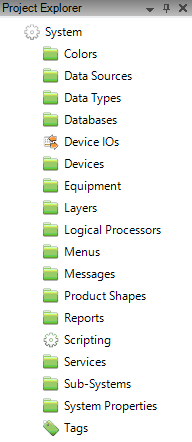
The Project Explorer Panel displays a tree view of all the objects in a Project grouped by their type. The objects displayed can be Equipment, Reports, Colors etc.

If the object has an associated Manager then the Right click menu has the entry Manage… When this is selected the Manager window appears allowing the user to manage the objects.
If the Import and Export are supported these will appear as options in the right click menu.
If the group supports Paste (e.g. Colors) then the user can paste objects.
From the Project Explorer view there are a number of actions the user can perform:
Drill down to an object
If there are objects in the group then the group has a small triangle to the left to indicate this group can be expanded into a list of each object. When expanded the group can be collapsed by clicking on the group.
In the image above the Colors group has members but the Equipment group does not.
When a single object is selected its properties are displayed in the Property Editor Panel.
Create a new object
Most groups will support a New… option when Right clicked after being selected. This creates a new object of that type in the group with the default name and opens the Property Editor Panel so the properties for the new object can be set.
Copy and Paste objects
If a group supports Copy and Paste these options will be available in the Right click menu and allow an object to be copied within and between Projects.
Note: Pasted objects can not retain the original name as this could result in conflicts. They will always be given the next default name for that equipment type.
Rename an object
If you choose Rename from the Right click menu or double click a single object on the group then you will be able to rename the object. The name change will be reflected in the Property Editor Panel.
Delete a group of objects
The Project explorer tree supports multi-select so you can select all the objects in the list from the selected entry to the next selected entry with Shift and/or add to the selected items by using Ctrl with select.
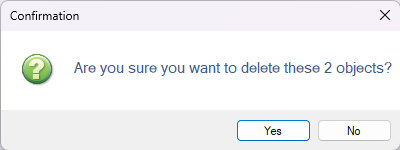
Once you have selected the items to be deleted, using the Right click menu offers a Delete option that allows these to be deleted. You will be asked to confirm the delete action.

Note: This is the best way to quickly remove large number of objects. e.g. all the PE Sensors on a specific PLC (assuming the PLC name prefixes the sensor name).
Special options
Some groups have special entries when Right click is used on the selected group. These special groups are:
Equipment
A right click on the Equipment entry provides the Import Properties… option to load and set equipment properties from a CSV file created by Export Properties.

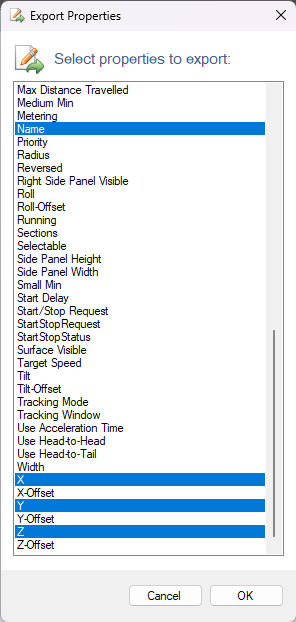
A right click on a specific equipment type provides the Export Properties… option. Selecting this option opens a window that lists all the properties of this equipment type and allows a multi-select of each.
In the example image, only the Name,X,Y and Z properties have been selected to export.
Pressing OK opens an Export Properties To File dialogue window which allows the user to save the CSV file.
The saved file can be loaded with the Import Properties option detailed above or from the Project Ribbon > Component Properties option.
Any errors encountered in the import are reported in an Error window.
Note: Note: Equipment does not have a ‘New’ option. To create Equipment drag it from the Toolbox into the 3D window.
Scripting
The Scripting entry has no Right click menu and, when double clicked, only opens the Developer > Simulation Scripts window allowing the user to manage any Scripting the Project may have.
Windows
The Windows group has the option Close All allowing the user to close all the open windows.