Database Setup
Setting up the database can then be done in one of two ways: by restoring the entire database from a .bak file, or by setting up reports individually.
Restoring from a .bak file
Before getting started, it should be noted that this method can only be followed if the database already exists with all the required tables, stored procedures, and functions, and has been backed up to a .bak file. If this is not the case, the steps for setting up reports individually should be followed instead.
To get started, open Microsoft SQL Server Management Studio and connect to the database engine containing the data to use for the report(s).
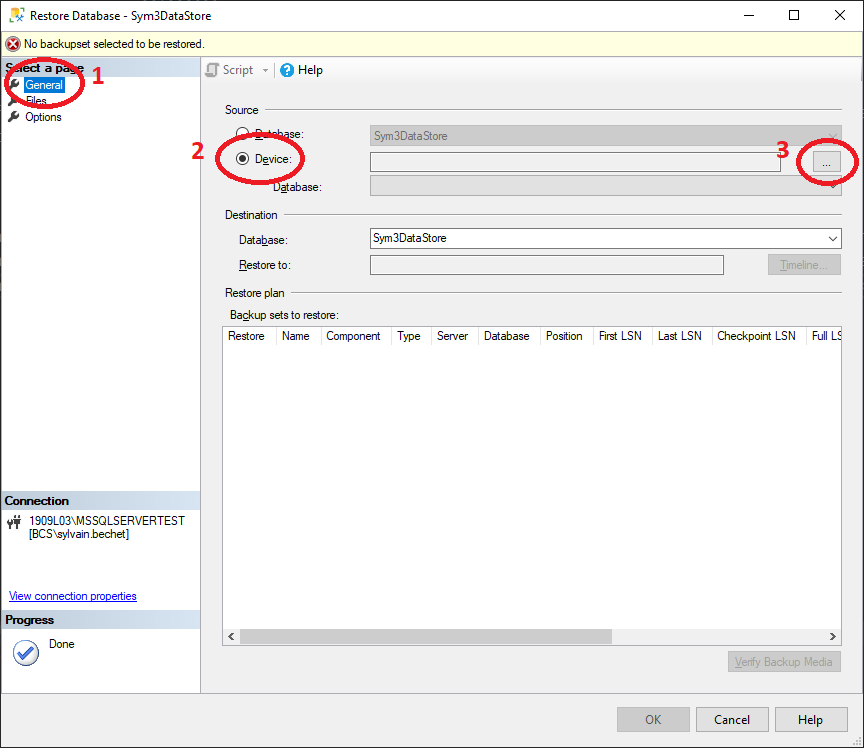
Then, right-click on the database where the backup will be restored and select Tasks > Restore > Database…. A window will pop up and under the General page, change the source to Device, and click on the … button:
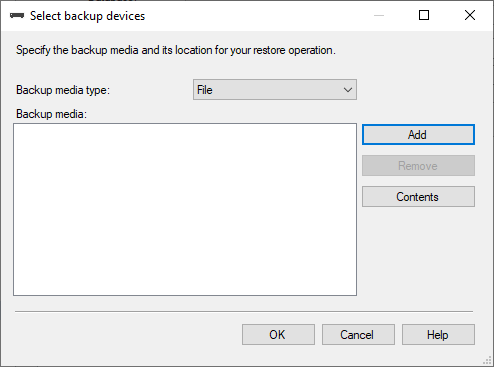
This will open another window where clicking on Add will allow you to locate the .bak file containing the backed up database:
After locating the .bak file and clicking on OK for both windows, the window on the General page should then be updated with the appropriate database information. You should make sure that the appropriate database is selected and click on Verify Backup Media
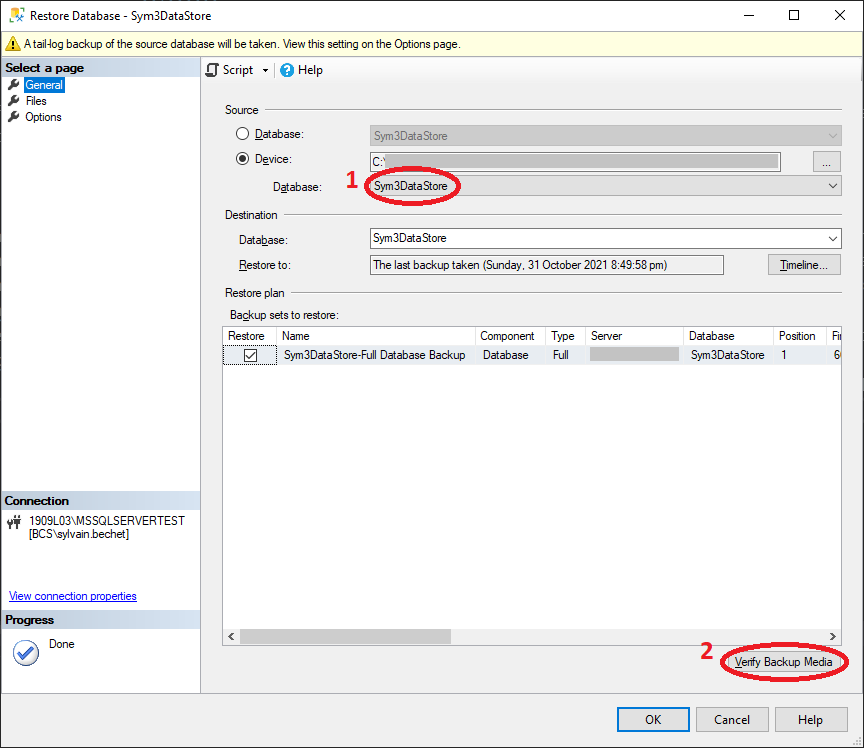
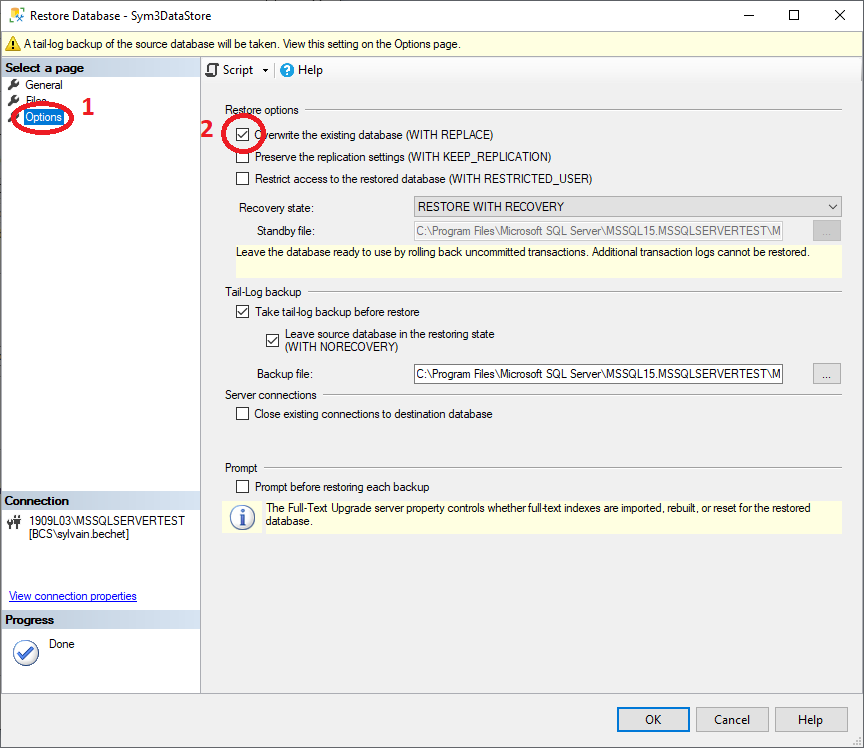
If no error come up, this means that backup file is valid and you should navigate to the Options page.
Then, under the restore options, tick in the checkbox Overwrite the existing database (WITH REPLACE).
WARNING:
This will overwrite the entire database with the backup, so make sure you that this is what you want to do. If you do not want to completely overwrite the entire database with the backup, you should use the second method and install reports individually (further below).
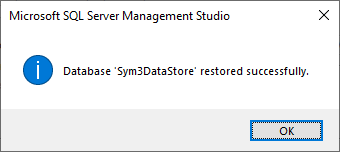
Click on OK and the database should be restored successfully.
Setting up reports individually
Before getting started, the desired report’s resources should be first downloaded from its documentation page and extracted using your preferred tool. The resources stored in the .zip file contain both the required files for the database setup and the report setup.
To get started, open Microsoft SQL Server Management Studio and connect to the database engine containing the data to use for the report(s).
Then, navigate to the report’s extracted resource folder: it should contain three folders named Database tables, Report file, and Stored procedures and functions.
Setting up database tables
If the tables storing the required data already exist/are already set up, you can skip to the Stored procedures and functions section.
If not, navigate inside the Database tables folder and open one of the .sql files in Microsoft SQL Server Management Studio.
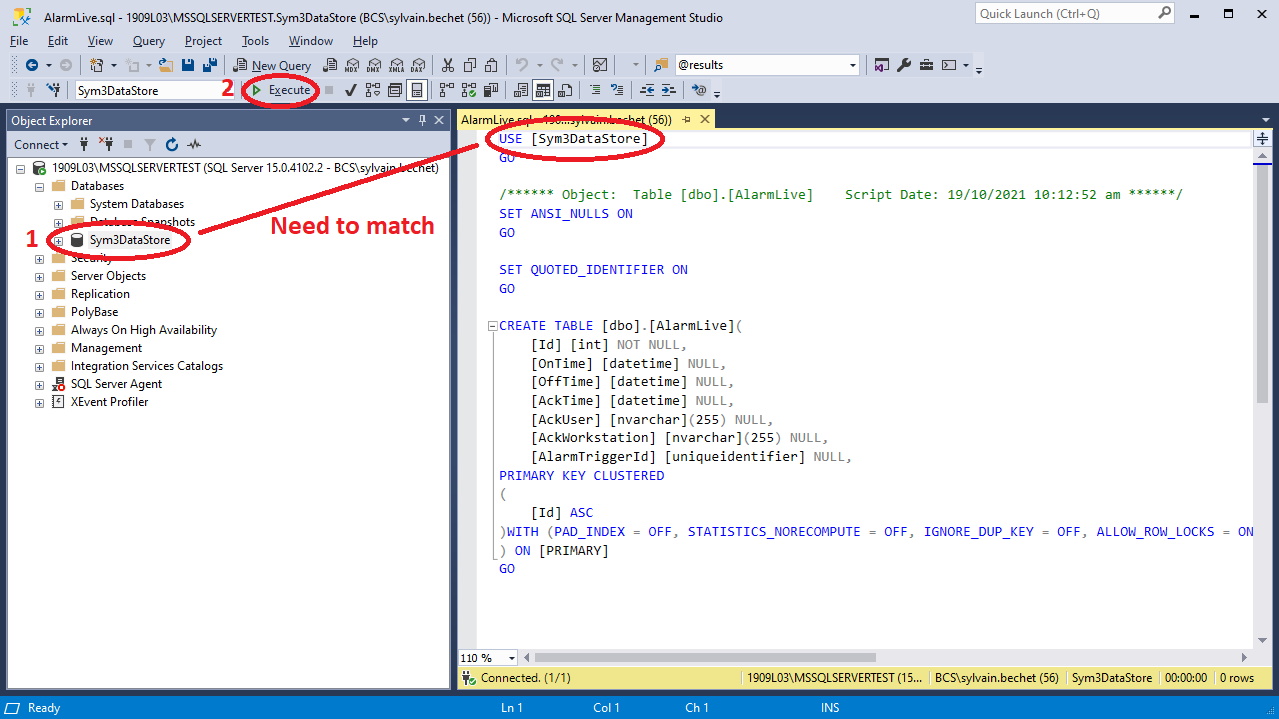
Once opened, make sure the name of your DB matches that of the one used in the script. If this is not the case, you should change the one used in the script to the correct one.
Making sure that the script window is focused, execute the script by clicking on Execute or press the F5 key.
If any error comes up, a message should appear under Messages with a brief description of the cause. Common errors and how to resolve them are covered further below.
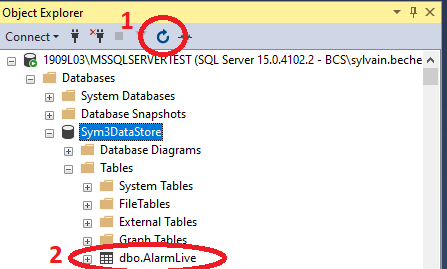
Otherwise, to check if the table was successfully added, select the database name and click on the refresh icon (or press F5). Then, expand the database’s dropdown, and under the Tables folder dropdown, your table should be there.
Repeat the above steps for each .sql file in the Database tables folder.
Setting up stored procedures and functions
To get started, navigate inside the Stored procedures and functions folder and open one of the .sql files in Microsoft SQL Server Management Studio.
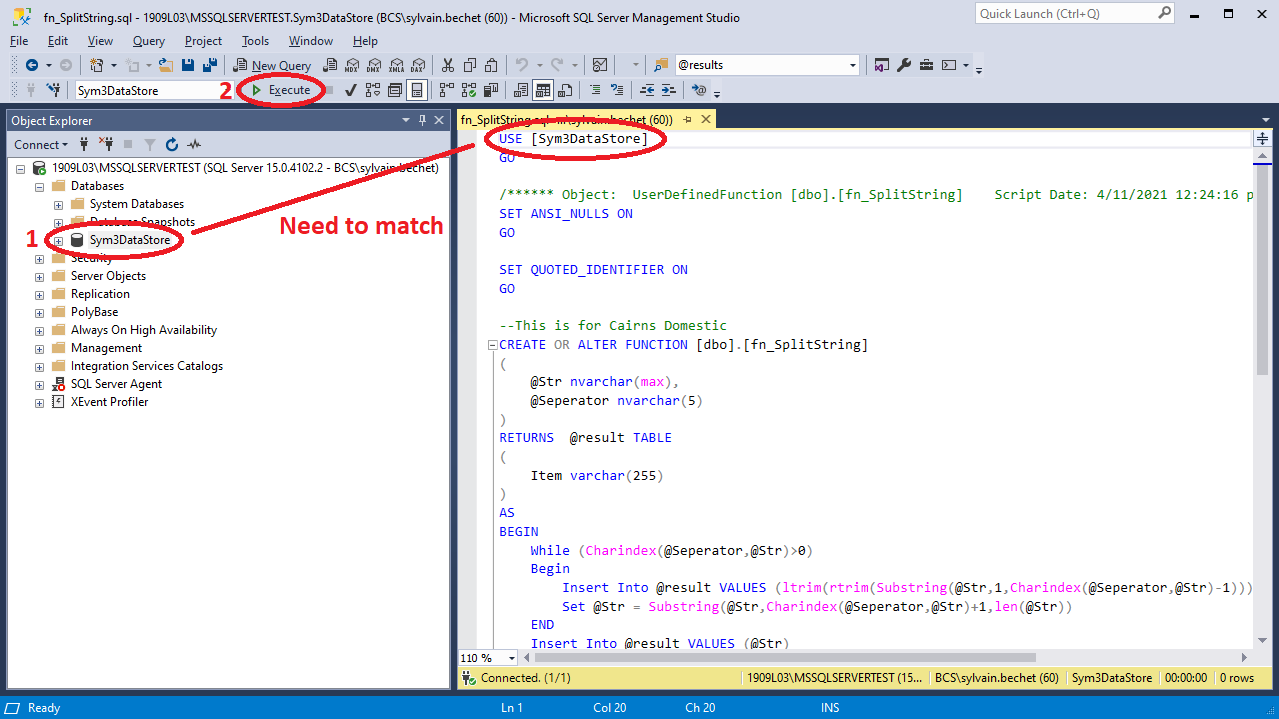
Once opened, make sure the name of your DB matches that of the one used in the script. If this is not the case, you should change the one used in the script to the correct one.
Making sure that the script window is focused, execute the script by clicking on Execute or press the F5 key.
If any error comes up, a message should appear under Messages with a brief description of the cause. Common errors and how to resolve them are covered further below.
To check if the stored procedure or function was successfully added, select the database name and click on the refresh icon (or press F5). Then, depending on whether a stored procedure or a function was added, expand the database’s dropdown and, under the Programmability folder, navigate to the following folder:
- For stored procedures (any .sql with the spr_ prefix), expand the Stored Procedures folder and the stored procedure should be there.
- For functions (any .sql with the fn_ prefix), expand the Functions folder and the function should be either under the Table-valued Functions folder, the Scalar-valued Functions folders, or the Aggregate Functions folder.
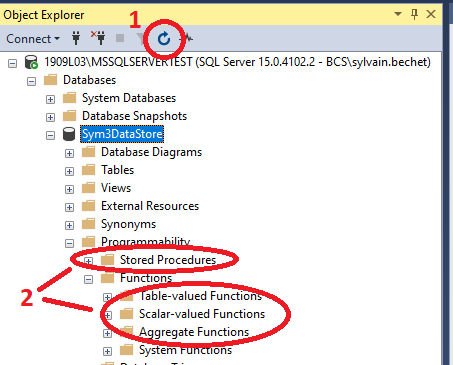
Repeat the above steps for each .sql file in the Stored procedures and functions folder.
Common errors and issues
Object already exists error
When executing a script to add a table, stored procedure, or function, this error comes up as there is already an object of the same type with the same name that exists in the database.
To resolve this error, check the table, stored procedure, or function that already exists in the database and compare it against the one in the script. If the existing one is identical to the one in the script, there is no need to execute the script since the object already exists. Otherwise, consider either renaming the existing table, stored procedure, or function or even deleting it.
Object dependency error
When executing a script to add a table, stored procedure, or function, this error comes up as one or more object it depends on could not be found.
This error can be resolved by leaving the execution of this script to last and executing the other scripts in the same folder first.
Note that executing that script last may lead to an Object already exists error as the table/stored procedure/function was already partially created. This can be resolved by deleting the partially created object and running the script again.
Object is not appearing in the object explorer
This issue is usually due to the object explorer not having been refreshed properly.
To resolve this issue, right-click on the database in the object explorer and select Refresh. If the object still cannot be located, this means that the object was either deleted or was not created properly, and may require to once again create by running the appropriate script.