Data Source: OPC DA
Data Sources define the PLC source that populate the Tags to be used in the Project.
Both OPC DA and OPC UA Datasources are supported in Sym3.
To link Sym3 with other datasources (eg. SQL), please contact Sym3 support for information on these OPC adaptors.
For these examples the Kepware OPC server is used.
Create a new Data Source
A Data Source can be defined in Sym3, right-click on Project Explorer > Data Sources then select ‘OPC DA’ from the ‘New Source’ menu option.

Or
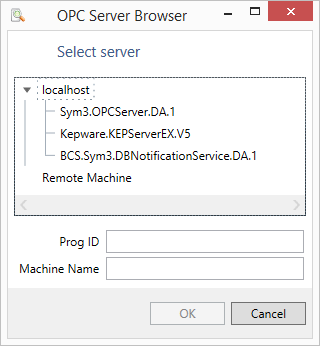
AA Data Source can be defined in Sym3, right-click on Project Explorer > Data Sources then select ‘Browse OPC…’ from the menu. An ‘OPC Server Browser’ dialog is shown:

- Server: Select either ’localhost’ if the Data source is on this machine or enter the Prog ID and Machine Name for the data source to use.
- Expand the tree of sources that appear and select one of the displayed options.
Creates the user property with a default name e.g. DataSource1.
Double-click on this name to change it. This name has to be valid for the selected equipment type and be of the correct type.
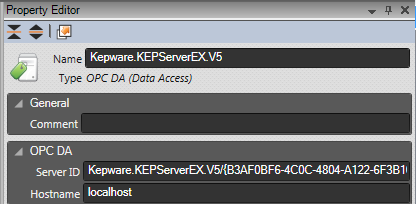
From the Project Explorer panel, select Data Sources and the settings for the Data Source will appear in the Property Editor Window; e.g. For a KepWare Data Source the entries may look like:

- Name: A unique name for this DataSource.
- Type: OPC DA (Data Access).
- Comment: Free form text for a memorable comment.
- OPC Server ID: The Server ID as read from the Browse icon in Data Source Manager Panel (Remove any GUID extension).
- Host Name: The Host Name as selected from the Browse icon in Data Source Manager Panel.
Delete a Data Source
Open the Data Sources Manager, select the entry to be deleted, right click the item and select ‘Delete’.
A confirmation screen will appear, ensure this is the correct Data Source and click Yes to delete it.
Kepware example
An example of a Kepware tag function that can be used for testing is to set up a tag and address with a user function. e.g.
Open Kepware configuration and create a new tag under Channel1.Device1 with a name. e.g. ‘ESA’
For the Address use ‘USER (2000,1,0,1,0)’ and a Datatype of ‘Boolean’. This is a user function that will toggle between True and False every 2 seconds.

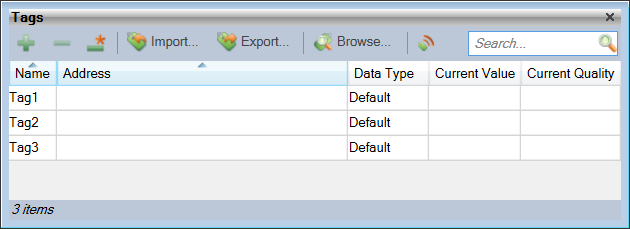
Open a new Editor project and add a single conveyor. Set a Data Source and enter a Tag named ESA.

Use the Show Live Values button (highlighted) to ensure the value changes. In this example the Tag quality is GOOD and the value is True.
Select the Conveyor and add a Binding with an expression of ESA. When the project is published and launched the Conveyor with be alternate between running and stopped every 2 seconds.