Speed Tuning
If Presence Tracking is enabled and the project conveyor or chute speed is not exactly the same as the real device, product creation at the PE might cause extra products created. Speed tuning enables the fine tuning of equipment speeds to prevent the creation of extra products.
Project Speed Higher
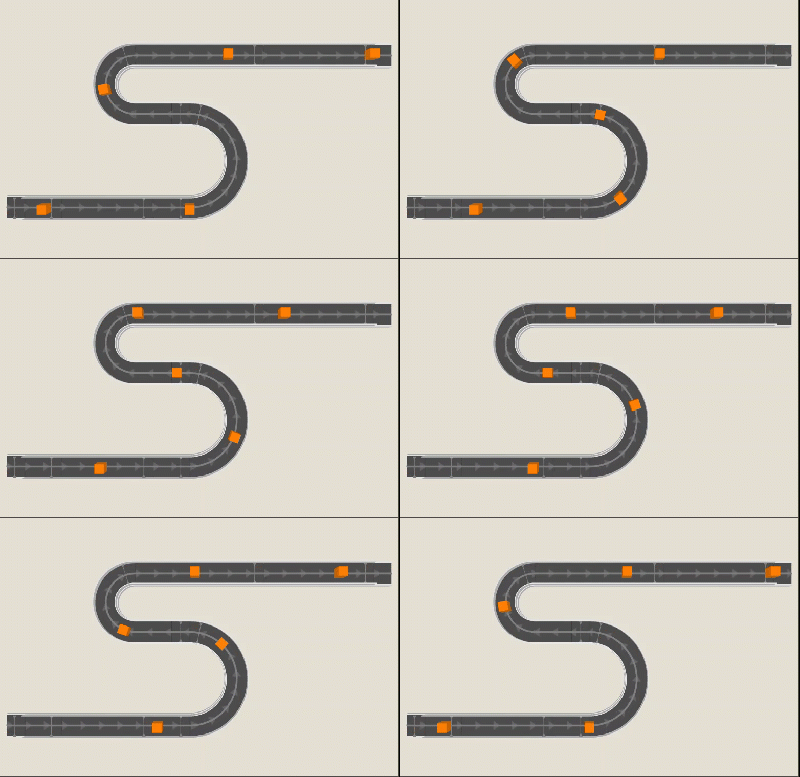
If the project speed is higher than the real speed, a product arrives at the project PE before the real PE is triggered. The product then suddenly disappears when the real PE trigger is not received when expected.

Project Speed Lower
If the project speed is lower than the real speed, the real PE is triggered before the project product arrives at the project PE. A new product is created and the original one disappears when it finally arrives at the project PE.

Mechanism
Speed tuning works by measuring the time it takes for a product to move between two real PE’s. The distance between the first PE (PE_1) and the second PE (PE_2) is assumed to be correct in the project.
This is by no means an accurate process but rather a best effort attempt at getting close to the real speed. The accuracy depends on the accuracy of the project in terms of:
- Travel distance (eg. conveyor length)
- PE positions (distance from the end)
- Connections (eg. source and destination conveyor setup)
- Distance between products (too close could lead to incorrect calculations)
In addition to this, the server does not know the size of the actual product and if the size changes drastically, it’s difficult to get an accurate average to use for calculations.
It is often more productive to manually tweak the speeds using the Speed Tuning dialog than using the auto tune or calibrate methods because of imperfections of real world scenarios.
Requirements
To do speed tuning, the following requirements must be met:
- Conveyor/Chute connections must be valid
- Tracking mode must be set to ‘Presence’
- Tracking window must be a valid value, roughly the size of the expected product
- At least some PE’s should be tracking (i.e not all set to ‘Not Tracking PE’)
When adding a button to the project window, select “Open Speed Tuning Dialog” action.

Speed Tuning Control

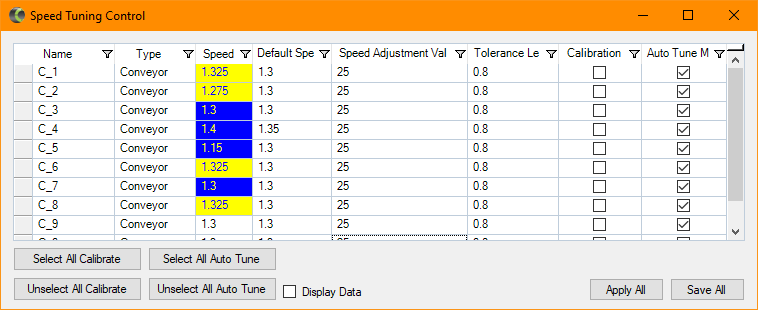
The Speed Tuning Control window lists all Conveyors and Chutes and allows modifications to speed.
| Field | Description |
|---|---|
| Name | Equipment Name |
| Type | Equipment Type |
| Speed | Current Speed (changes color on each update) |
| Default Speed | Configured speed (from project file) |
| Speed Adjustment Value (mm) | Size of speed increments during auto tune and calibration |
| Tolerance Length | Length around the PE to monitor (ignored when in calibration mode) |
| Calibration Mode | Calibration Mode enabled / disabled |
| Auto Tune Mode | Auto Tune Mode enabled / disabled |
| Select All Calibrate | Enable calibration mode for all equipment |
| Unselect All Calibrate | Disable calibration mode for all equipment |
| Select All Auto Tune | Enable Auto Tune mode for all equipment |
| Unselect All Auto Tune | Disable Auto Tune mode for all equipment |
| Display Data | Show equipment speed on SCADA display |
| Apply All | Apply all Current Speed to Default Speed |
| Save All | Save all Default Speeds to project file on server |
Auto Tune / Calibration
To enable Auto Tune or Calibration, select the Auto Tune / Calibration option of the equipment to tune (or select ‘Select All Auto Tune’ / ‘Select All Calibration’ for all equipment). This feature works best if products are roughly the same size and do not follow too close to each other. The initial changes may seem incorrect or slow, but leaving the system in auto tune for a while allows the system to get closer to the actual speed as more samples are processed.
If there is no speed change on an equipment that obviously has an incorrect speed for a while, try increasing the ‘Tolerance Length’ value of the equipment.
When an equipment seems to be ‘in tune’:
- Disable the Auto Tune feature for this equipment,
- Click the row header to select the row,
- Right click on the table,
- Select ‘Apply Selected’
To save the changes:
- Select all equipment to save (that have their speeds applied already) by clicking the row headers while holding CTRL key,
- Right click on the table,
- Select ‘Save Selected’
This will save all of the selected equipment’s ‘Default Speed’ to the project on the server.
NOTE
- Clicking ‘Apply All’ will apply ALL current speeds as default speeds to all equipment.
- Clicking ‘Save All’ will save ALL default speeds to the project file on the server.
- To ‘undo’ an ‘Apply’ operation, either:
- manually change the default speed(s), or
- restart Sym3 Operator Service
Manual Tuning
Be sure that neither Calibration or Auto Tune mode is enabled for the equipment to manual tune.
Observe the product entering the equipment to tune. If a new product is created before the observed one reaches the PE, then your equipment is too slow. If the a new product is created after the observed product have passed the PE, then your equipment is too fast.
To change the current speed, double-click on the equipment ‘Speed’ cell, change the value and press Enter. This process should be followed until the equipment seem to be in tune.
When an equipment seems to be ‘in tune’:
- Disable the Auto Tune feature for this equipment,
- Click the row header to select the row,
- Right click on the table,
- Select ‘Apply Selected’
To save the changes:
- Select all equipment to save (that have their speeds applied already) by clicking the row headers while holding CTRL key,
- Right click on the table,
- Select ‘Save Selected’
This will save all of the selected equipment’s ‘Default Speed’ to the project on the server.