Create and Apply a Self-Signed Certificate
Sym3 Web provides the ability to create and apply a self-signed SSL certificate for enabling remote access. The user interaction is minimized to make it easy. For the users preferring to generate and install the certificate manually, please refer to the SSL And External Connections.
Create a Self-Signed Certificate
The Sym3 Web generated certificate is named Sym3Web Self-Signed Certificate. The settings page CERTS tab will show the Create Self-Signed Certificate button if there is no such certificate in LocalMachine personal folder of the certificate store (Cert:\LocalMachine\My). Follow the steps below to create and apply the certificate.
-
On Sym3 Web, Open the web application settings
-
Open the CERTS tab
-
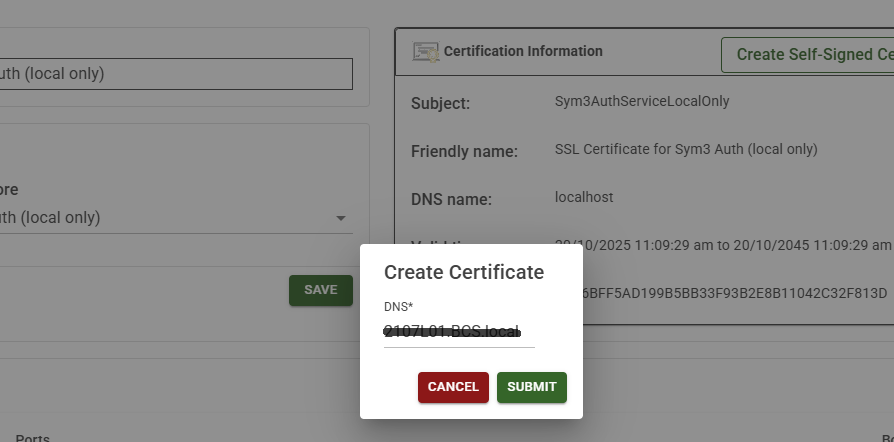
Click the Create Self-Signed Certificate button to popup the ‘Create Certificate’ dialog.
-
Enter the server’s IP address or hostname in the DNS field. Multiple entries are accepted (semicolon delimited).
localhostwill be added automatically for the convenience of local access.
Note: If the server is managed by the Sym3 Activate Service, enter the server’s static IP address first, then the shared IP address.
-
Click the Submit button. Sym3 Web will then generate a new certificate that includes the specified IP address or hostname.
-
It’s a self-signed certificate, each client computer must install the certificate on the machine. The steps see
Sym3 Web Certificate.
The new generated certificate will be applied immediately. It may take some time. After the new certificate is applied, the browser will disconnect from the server.
Note: The certificate will be applied to Sym3 Auth Service as well to simplify the configuration. Modifying the Sym3 Auth Service settings manually if a different certificate for Sym3 Auth is required.
Restart the Sym3 Web and Sym3 Auth services after the certificate is applied.
Update the Self-Signed Certificate
When the circumstances change (e.g., the server’s IP address changes), the existing self-signed certificate needs to be updated to reflect the changes. The steps are similar to creating a new self-signed certificate.
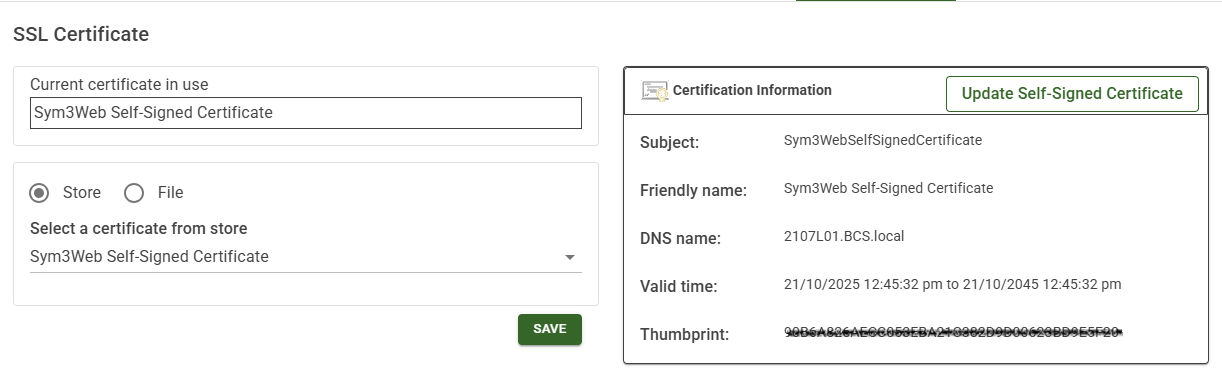
The function can only used to update the existing Sym3Web Self-Signed Certificate. A ‘Update Self-Signed Certificate’ button will be shown on the CERTS tab if such a certificate exists in LocalMachine personal folder of the certificate store (Cert:\LocalMachine\My).
-
Click the Update Self-Signed Certificate button to popup the ‘Create Certificate’ dialog. The backend logic is creating a new self-signed certificate to replace the existing one.
-
Enter the server’s IP address or hostname in the DNS field. Multiple entries are accepted (semicolon delimited).
localhostwill be added automatically for the convenience of local access. -
Click the Submit button. Sym3 Web will then generate a new certificate that includes the specified IP address or hostname.
-
It’s a self-signed certificate, each client computer must install the certificate on the machine. The steps see
Sym3 Web Certificate.
The new generated certificate will be applied immediately. No need to click the Save button on the page.
Restart the Sym3 Web and Sym3 Auth services after the certificate is applied.
Trust the Certificate in Client Machine or Distribute it to Client Computers by Using AD Group Policy
Sym3Web Self-Signed Certificate is self-signed. Each client computer must install the certificate on the machine. The steps see Sym3 Web Certificate.
This can be done for all computers in the domain using Active Directory Group Policy. The steps can be found on the Microsoft learning page.
Steps to restart the services
- Open Windows Services (Window Key + “Services”).
- Restart the following services:
- Sym3 Auth Server
- Sym3 Web Service - Close your web browser.
- Open your web browser, and open the web application with the DNS name.