Enable Remote Access
Sym3 Operator >= V10 is supporting only secured connections:
- https instead of http.
- wss instead of ws.
Hence, the configuration of Sym3 requires more configuration.
For a new installation of Sym3 Operator, Sym3 Web will use the certificate SSL Certificate for Sym3 Auth (local only) created during the installation. The DNS of the certificate is localhost, meaning https://localhost:4031/Sym3Web is only accessible from the server.
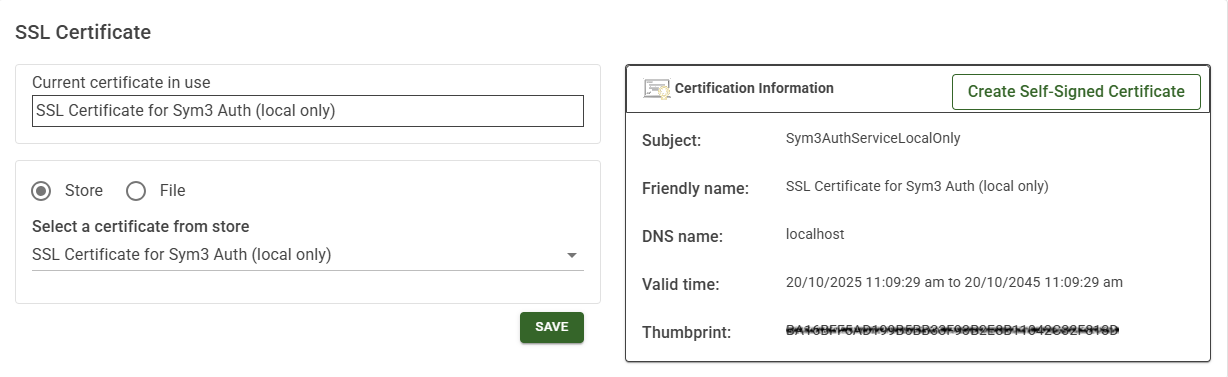
To enable remote access (a web browser from outside the server), an SSL certificate with the specified DNS name is required.
- Create a self-signed certificate
(The instructions of generating and using a self-signed certificate) - Use a provided certificate
(The instructions of using a provided certificate.)
Note: Applying a certificate will only be done once after the first installation. It will not be required after an upgrade of Sym3.
Service port binding for secured WebSocket
Sym3 Operator services are using secured WebSocket. Hence, the service ports must be bound to a SSL certificate. Sym3 Web binds the ‘Current certificate in use’ to the ports automatically after applying a certificate. For the users preferring to bind the ports manually, please refer to the SSL And External Connections.
After the certificate is applied, it will be automatically bound to the service ports.
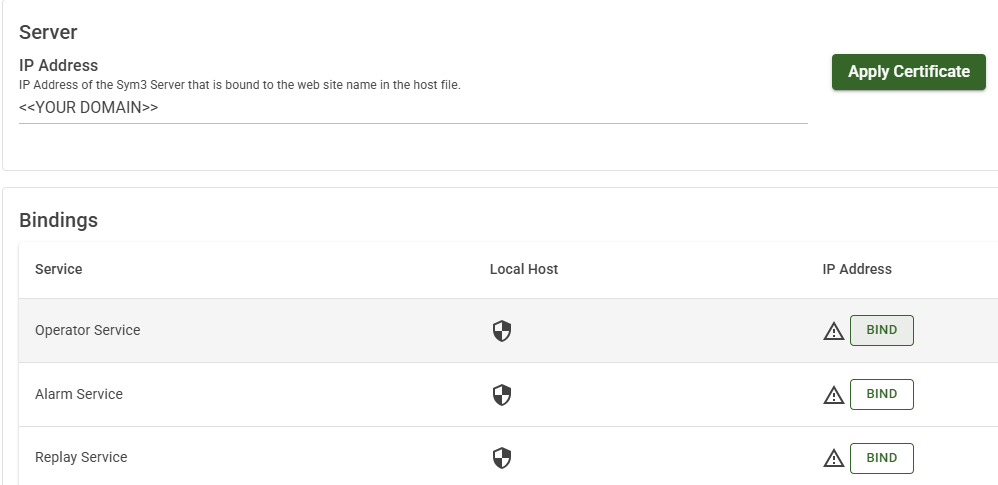
If any service has an unbound port, click the Bind button to bind it manually.
WebSocket communication is required for the 3D model and the alarm display. Please import the certificate file into the certificate store. Please contact Sym3 Support for help with this.