Menus
For Sym3 Integrator:
- Menus are used to add menu items to the existing context menus on:
- 3D equipment.
- 3D View Background.
- The menu items will be added (at the top) to the native menu when the simulation is running .
For Sym3 Operator:
- Menus are used to assign a contextual menu on:
- 3D equipment.
- 3D View Background.
- Alarm Grid.
- Menus are applied on the client side (PC Client and Web Client).
- The first entry of a menu will dictate the behavior when the user Left clicks on the equipment.
A context menu is displayed at the mouse location when the user Right clicks on the equipment.
Create a new Menu
From the Project Explorer Panel use Right-click over the entry Menu and select New.
A new Menu is created with a default name of ‘Menu1’ where the number increments for each new Menu and you are able to rename the Menu at this stage.
Edit Menu properties
If the Property Editor is not displayed, click on Ribbon > Home > Property Editor to open the Property Editor. When the Menu is selected its properties will be displayed in the Property Editor Window allowing you to make changes.
Delete a Menu
Use Right-click on a Menu or a group of Menus and select Delete from the menu. You will be asked to confirm the deletion.
Rename a Menu
Use Right-click on a Menu and select Rename from the menu. You can enter the new name.
Assign a Menu
Assign to a 3D View:
- Click on the background of the 3D view.
- In Property Editor, set the Menu property (in the ‘General’ category).
Assign the an equipment:
- Select the equipment in the 3D view or the Project Explorer.
- In Property Editor, set the Menu property (in the ‘General’ category).
Properties

| Name | Description |
|---|---|
| Name | Name of the Menu. This name must be unique in the list of Menus. |
| + | Add a new menu item. Defaults to ‘Text’ |
| ± | Inserts a separator line in the menu |
| - | Delete the selected menu item |
| ⇧ | Move the selected item up |
| ⇩ | Move the selected item down |
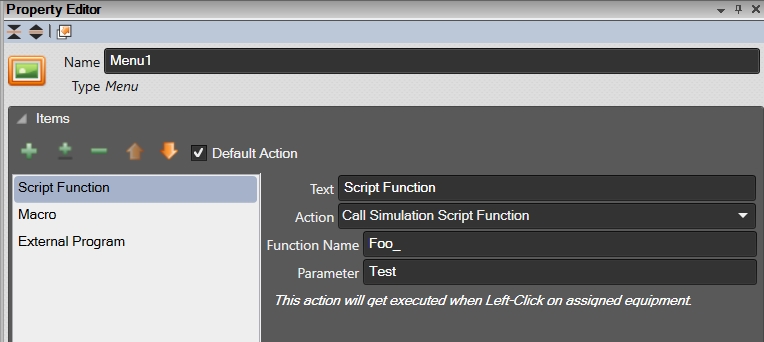
| Default Action | Appear only when select first item in the menu. Once tick, the first item set as default action, which get executed when Left-Click on assigned equipment. Integrator Only |
Options
Each menu item (except the ‘Separator’) will have those following properties:
| Name | Description | Sym3 |
|---|---|---|
| Permissions | list of permissions required to action the button. Any mouse event on the Menu will be ignored unless the current user has all the selected permissions enabled. See “Users"panel to define new permissions or edit the current ones. | Sym3 Operator Only |
| Event Log | Configure an Event Log entry for this control. See “Event Logs” | Sym3 Operator Only |
| Text | The text to use when the user Right clicks over the object that has this menu attached to it. | |
| Visibility | Two checkboxes to decide the visibility of the menu item on the client side:
By default, the menu item is visible in both. |
|
| Action | The action to be executed. The properties available depends upon the Action selected. |
Examples
Example 1
Call a simulation script function using the ‘Execute Macro’ action. The example for option 2 may be:
Project.CallSimulationScriptFunction("MyMenu", Caller, 2);
The script function may be defined as follows:
function MyMenu(caller, parameter) {
	LogDebug("MyMenu called: " + caller.Name + " and parameter=" + parameter);
}
When a menu option is selected the caller will be the equipment then parameter will be the parameter passed.
Example 2
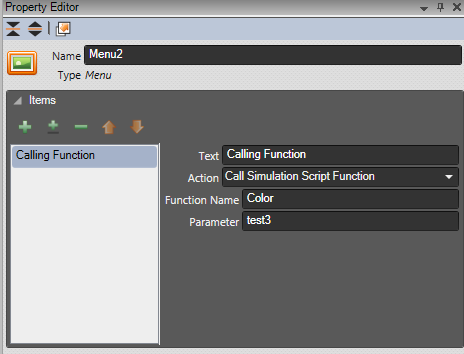
Calling simulation script function.

function Color(caller, parameter)
{
	caller.SurfaceColor = "Sym3 Red"
	LogDebug("caller = " + caller.SurfaceColor );
	LogDebug("parameter = " + parameter);
}